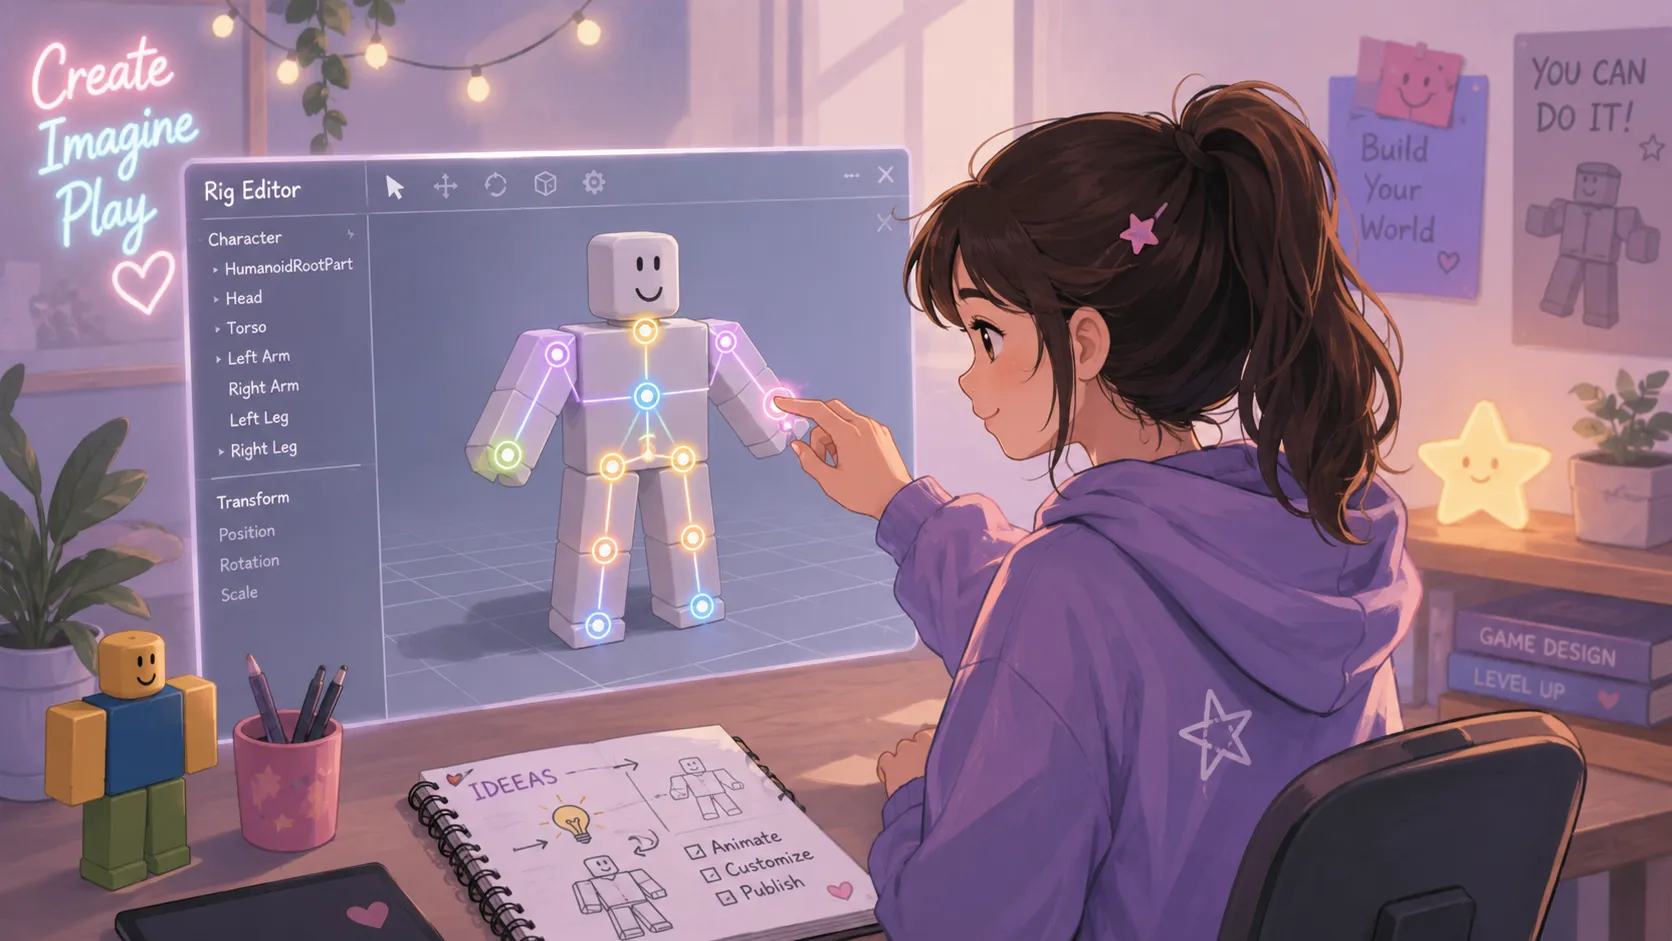
Before creating high-quality Roblox poses, it’s important to understand how Roblox Studio currently handles character animation. Recent Roblox Creator Hub documentation confirms that the built-in Animation Editor (sometimes referred to as the Clip Editor in newer interfaces) remains the primary tool for creating poses and animations. Developers create poses by moving and rotating joints on a rig, while Roblox automatically interpolates between keyframes to generate smooth movement.
Understanding Rigging in Roblox Studio
Rigging is the invisible skeleton that gives life to a Roblox character. Think of it as the framework inside a puppet. Without strings, the puppet cannot move; without joints and bones, a Roblox character cannot pose or animate. Every professional animation starts with a properly constructed rig because the rig determines how naturally the character bends, twists, reaches, and reacts within the game world.
In Roblox Studio, a rig consists of connected body parts linked through joints. These joints allow developers to manipulate individual sections of the body such as the arms, legs, torso, and head. According to Roblox Creator Hub documentation, animations are created by moving these joints into specific positions known as poses. Once multiple poses are placed across a timeline, Roblox automatically creates smooth transitions between them.
Many beginners jump directly into animation without understanding rigging fundamentals. This often leads to awkward movements, distorted body parts, and unrealistic character behavior. Learning rigging first is like learning anatomy before drawing people. The better you understand the structure underneath, the easier it becomes to create believable movement.
Rigging also influences performance and compatibility. Well-structured rigs work smoothly with Roblox’s animation systems, while poorly constructed rigs can cause clipping issues, stretching, and unexpected motion during gameplay. Whether you’re building NPCs, action sequences, cutscenes, or character showcases, mastering rigging fundamentals gives you a strong foundation for every animation project.
What Is a Rig?
A rig is a collection of connected parts controlled through joints. It acts as the skeleton of a Roblox character and allows animators to manipulate body movements without moving every individual piece manually.
Difference Between R6 and R15 Rigs
| Feature | R6 | R15 |
|---|---|---|
| Body Parts | 6 | 15 |
| Flexibility | Limited | High |
| Animation Quality | Basic | Advanced |
| Recommended for New Projects | No | Yes |
Recent Roblox animation guides continue recommending R15 rigs because they provide significantly more joints and smoother animation possibilities.
Essential Tools for Posing Characters
Successful character posing depends heavily on using the right tools. Roblox Studio provides several built-in systems that simplify the animation process and help developers create realistic movements without requiring advanced 3D animation software. Understanding these tools can dramatically improve your workflow and reduce the time needed to create professional-looking poses.
The most important tool is the Animation Editor. Roblox’s official documentation describes it as the primary workspace for creating animations. It allows users to select rigs, manipulate joints, create keyframes, preview animations, and publish finished motion sequences.
Alongside the Animation Editor, the Move and Rotate tools play a crucial role. These controls allow precise adjustment of body parts during pose creation. Small rotations of the shoulders, elbows, knees, and hips often make the difference between a stiff robotic stance and a believable human pose. Developers frequently underestimate how much subtle positioning affects the final result.
The timeline system is equally important. Every pose exists on a specific frame within the timeline. By creating multiple poses at different points, animators establish the movement path that Roblox follows. The software then calculates intermediate positions automatically, saving countless hours of manual work. This process, commonly known as interpolation or tweening, is one of the most powerful features in Roblox animation workflows.
Understanding how these tools work together transforms posing from a trial-and-error process into a structured creative workflow capable of producing high-quality results.
Roblox Animation Editor
The Animation Editor allows you to create poses, keyframes, transitions, and complete character animations directly within Roblox Studio.
Move and Rotate Tools
These tools provide precise control over limbs, enabling realistic body positioning and smooth adjustments.
Timeline and Keyframes
Keyframes record a pose at a specific point in time. The timeline organizes these poses into a sequence that becomes an animation.
Popular Plugins for Character Posing
While Roblox’s built-in tools are powerful, many experienced developers enhance their workflow using specialized plugins. Plugins can accelerate the posing process, provide additional animation controls, and improve efficiency when working on complex projects involving multiple characters or advanced motion sequences.
One of the most respected tools in the Roblox development community is Moon Animator 2. Industry professionals frequently describe it as the standard animation plugin for serious Roblox projects because it offers advanced easing controls, multi-rig support, interpolation options, and sophisticated animation workflows. Recent developer resources continue highlighting Moon Animator 2 as a preferred solution among professional studios.
Another interesting addition is Pose-A-Dude, a newer plugin designed specifically for quickly positioning characters and creating static poses. It is especially useful for builders, showcase creators, and level designers who need posed NPCs without building complete animations.
Rig editing plugins also play an important role when working with custom models. These tools simplify joint creation, rig adjustments, and troubleshooting. For developers importing characters from Blender or other 3D applications, rig editors can save enormous amounts of setup time and help avoid common rigging mistakes.
Plugins should complement your workflow rather than replace your understanding of animation fundamentals. Learning the core principles first ensures you can use any tool effectively regardless of future updates or interface changes.
Moon Animator 2
Widely regarded as one of the most powerful Roblox animation plugins available. It supports advanced animation features and professional production workflows.
Pose-A-Dude
Ideal for quickly placing static character poses in showcases, scenes, and environments.
Rig Editing Tools
Useful for custom rigs, imported models, and complex animation projects requiring advanced joint management.
Setting Up a Character for Posing
Before creating poses, you need a properly prepared character rig. This preparation stage often determines whether your animation process feels smooth or frustrating. Skipping setup steps can result in missing joints, inaccessible body parts, and broken animations that consume hours of troubleshooting later.
Start by creating or importing a rig. Roblox Studio includes a Rig Generator that allows developers to insert ready-made character models. Official documentation recommends beginning with a pre-built rig because these models already contain the necessary components for animation.
After selecting your rig, prepare your workspace. Position the camera so you can clearly see the character from multiple angles. Disable unnecessary snapping options if they interfere with precise adjustments. Roblox educational resources specifically recommend checking camera visibility and rotation settings before beginning the animation process.
Organization also matters. Rename animations clearly, structure your Explorer hierarchy logically, and keep assets grouped together. Professional animators treat project organization as part of the animation workflow because it speeds up revisions and collaboration.
The goal is to create an environment where every body part is easily accessible and every movement can be adjusted quickly. Once setup is complete, the actual posing process becomes significantly easier and more enjoyable.
Creating or Importing a Rig
Use the Rig Generator or import a custom rig designed in external software such as Blender.
Preparing the Workspace
Ensure clear camera angles, accessible body parts, and an organized project structure before animating.
Step-by-Step Process for Creating Poses
Creating a pose may seem simple at first glance, but professional-quality poses require a methodical approach. Every movement should communicate intention, emotion, and balance. A strong pose tells a story even when viewed as a single still frame.
Begin by opening the Animation Editor and selecting your rig. Create a new animation and position the timeline scrubber at the frame where you want the pose to appear. Roblox documentation confirms that moving or rotating a joint automatically creates keyframes for that position.
Next, start adjusting major body sections. Focus first on the torso and hips because these establish the character’s center of gravity. Once the foundation feels natural, move on to the arms, legs, head, and hands. Many beginners do the opposite and end up with poses that look unstable or physically impossible.
Pay close attention to asymmetry. Real people rarely stand perfectly balanced. Slight shoulder tilts, head rotations, and hip shifts create visual interest and realism. Imagine how the character would distribute weight if they were a real person standing in front of you.
After completing the pose, review it from multiple camera angles. Save keyframes and make incremental adjustments until everything feels natural. Small refinements often produce dramatic improvements in overall quality.
Opening the Animation Editor
Select your rig and launch the Animation Editor from Roblox Studio.
Creating the First Pose
Position the timeline and begin rotating joints into your desired stance.
Adjusting Body Parts
Start with the torso, then refine limbs, head orientation, and hand positioning.
Saving Keyframes
Every significant pose should be saved as a keyframe for future editing and animation development.
Testing Poses in Different Environments
A pose that looks amazing in a blank workspace may look completely different inside a finished game environment. Testing is an essential stage that many creators overlook. The purpose of testing is not simply verifying that the pose works; it is ensuring that the pose communicates effectively under real gameplay conditions.
Lighting plays a major role. Strong directional lighting can highlight body language, while poor lighting can hide important details. Try viewing your character under bright sunlight, indoor lighting, shadows, and colored environments. Each situation reveals different strengths and weaknesses in your posing choices.
Camera positioning is equally important. Players rarely view characters from a single angle. Rotate the camera around the pose and check how it appears from the front, sides, and above. A dramatic pose from one angle can appear awkward from another. Testing multiple perspectives ensures consistency.
Gameplay integration is another critical factor. If the pose is part of an animation sequence, test it while the game is running. Watch for clipping issues, environmental collisions, and unexpected interactions with terrain or objects. Community discussions often recommend running simple animation tests before finalizing any rig or pose setup.
By evaluating poses in realistic conditions, you create animations that remain effective regardless of where players encounter them.
Lighting and Camera Angles
Evaluate your poses under different lighting conditions and viewing perspectives.
Gameplay Testing
Test poses during actual gameplay to identify clipping, balance, and movement issues.
Tips for Natural and Dynamic Animations
Natural animation is about more than moving limbs. It is about convincing the viewer that a character has weight, intention, and personality. The most memorable animations often succeed because they capture subtle human behaviors rather than relying on exaggerated movement alone.
One of the most important principles is weight distribution. Every pose should have a believable center of gravity. Ask yourself where the character’s weight is resting. If the answer is unclear, the pose will likely appear awkward. A slight shift in the hips or shoulders can instantly improve realism.
Timing and spacing are equally important. Expert animators frequently point out that animation problems often stem from poor timing rather than incorrect poses. Smooth transitions and appropriate speed variations help characters feel alive instead of robotic.
Exaggeration is another powerful technique. Realistic movement does not always mean literal movement. Slightly exaggerating actions often makes animations clearer and more engaging, especially in stylized Roblox experiences. Think of animation as visual storytelling rather than pure simulation.
Pay attention to secondary motion as well. Head movement, hand gestures, and subtle torso shifts add depth and personality. These small details separate amateur work from professional-quality animation and help transform static poses into compelling character performances.
Weight Distribution
Ensure the character’s balance feels believable and physically supported.
Exaggeration and Motion
Use controlled exaggeration to create more expressive and visually engaging poses.
Timing and Spacing
Focus on smooth transitions and varied movement speeds to avoid robotic animation.
Common Mistakes to Avoid When Posing
Many posing mistakes occur because creators focus on individual limbs instead of the entire character. One common error is creating perfectly symmetrical poses. While symmetry can work in certain situations, it often makes characters appear stiff and lifeless. Natural body language typically includes subtle asymmetry.
Another mistake involves ignoring the character’s center of gravity. Characters that appear unable to support their own weight immediately break immersion. Always check whether the pose could realistically exist in the physical world.
Over-rotating joints is another frequent issue. New animators often push body parts beyond comfortable ranges of motion, creating unnatural distortions. Even stylized characters benefit from believable anatomical limitations.
Developers also tend to overlook hands and facial orientation. Hands communicate emotion, while head direction guides viewer attention. Leaving these elements in neutral positions can weaken an otherwise strong pose.
Finally, many creators skip testing. A pose should never be considered finished until it has been reviewed from multiple camera angles, lighting conditions, and gameplay situations. Testing reveals flaws that are often invisible during the initial creation process.
Conclusion
Learning how to pose rigs in Roblox Studio is one of the most valuable skills a Roblox creator can develop. Strong posing serves as the foundation for compelling animations, immersive cutscenes, engaging NPC interactions, and visually appealing character presentations. By understanding rigging fundamentals, mastering Roblox’s Animation Editor, leveraging useful plugins, and applying professional animation principles, you can transform ordinary character models into expressive digital performers.
The key to improvement is practice. Start with simple poses, study real-world body language, test your work extensively, and gradually challenge yourself with more complex animations. Every professional animator began with basic poses. The difference is that they kept refining their craft until movement became second nature.
FAQs
1. What is the best rig type for Roblox animation?
R15 is generally considered the best choice because it provides more joints, smoother movement, and greater animation flexibility than R6.
2. Can I pose characters without creating animations?
Yes. You can use the Animation Editor or plugins such as Pose-A-Dude to create static poses for NPCs, showcases, and screenshots.
3. Which plugin is most popular for Roblox animation?
Moon Animator 2 is widely recognized as one of the most popular and powerful animation plugins among professional Roblox developers.
4. Why do my poses look robotic?
Robotic poses usually result from symmetrical positioning, poor weight distribution, limited torso movement, or improper timing between keyframes.
5. How can I make my animations more realistic?
Focus on body balance, natural posture, asymmetry, timing, spacing, and subtle secondary movements such as head turns and hand gestures.
Kellan Rhodes is a 29-year-old American content writer based in Boise, Idaho. He specializes in technology, gaming, and digital culture, bringing years of experience researching and producing reliable online content. His work emphasizes accuracy, practical insights, and reader-first publishing standards. As a contributor to gamersrealm.online, he focuses on creating well-researched articles that help readers make informed decisions while maintaining strong editorial integrity and trust.